Preamble
I recently just upgraded my 3D printer from the Creality K1C to the K2 Combo edition. I was printing all the usual things one does when they are getting to grips with a new printer: endless Benchys, Gridfinity baseplates, Pokémon figurines. But when I realized that my workbench was missing something, a ratchet screwdriver.
So I look on all the usual 3D model websites to see if I can find something I like the look of, because of course, I just spent all my money on a 3D printer. But I could not find anything I liked the look of, so instead of spending 15 quid on a decent Xiaomi ratchet, which I probably should have just done, I decided; well screw it, I’m gonna make my own, how hard can it be?
TLDR; Download from here: https://www.printables.com/model/1656899-print-in-place-bi-directional-ratchet-screwdriver
Design and Design Again
I had a vague idea of what I wanted: something compact, satisfying to use, and ideally something that didn’t explode the first time I applied actual torque. Simple. I had an idea of the requirements in my mind, but it is only after the project is complete that I am writing these down (note to future self on that one).
- must accept a regular 6.35mm hex bit
- must be fully 3D printed
- must be print-in-place (because apparently I enjoy suffering)
- and lastly, must ratchet in both directions, and also lock
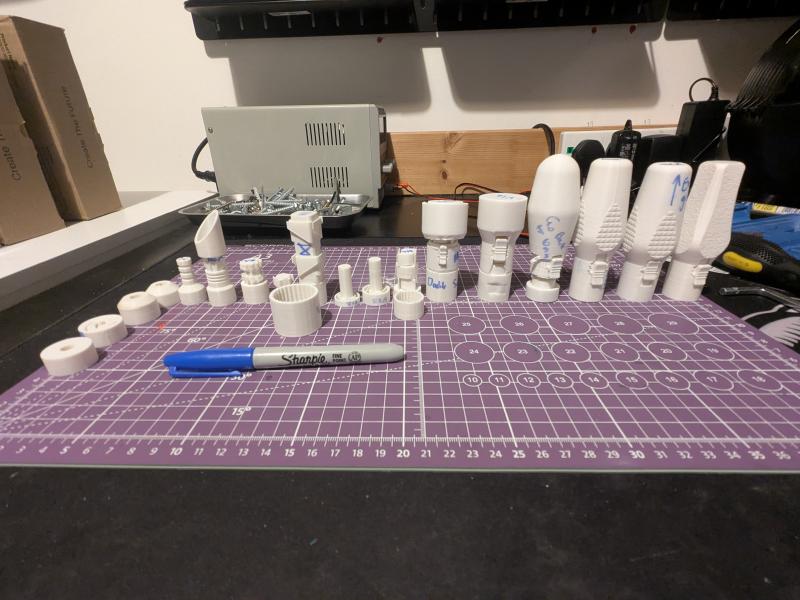
Naturally, I then ignored how difficult that last one would be. This ended up taking about 30 test prints to get right! But having come out the other side of this mildly chaotic process, it is only now that I can retroactively pretend there were a few clear milestones along the way.
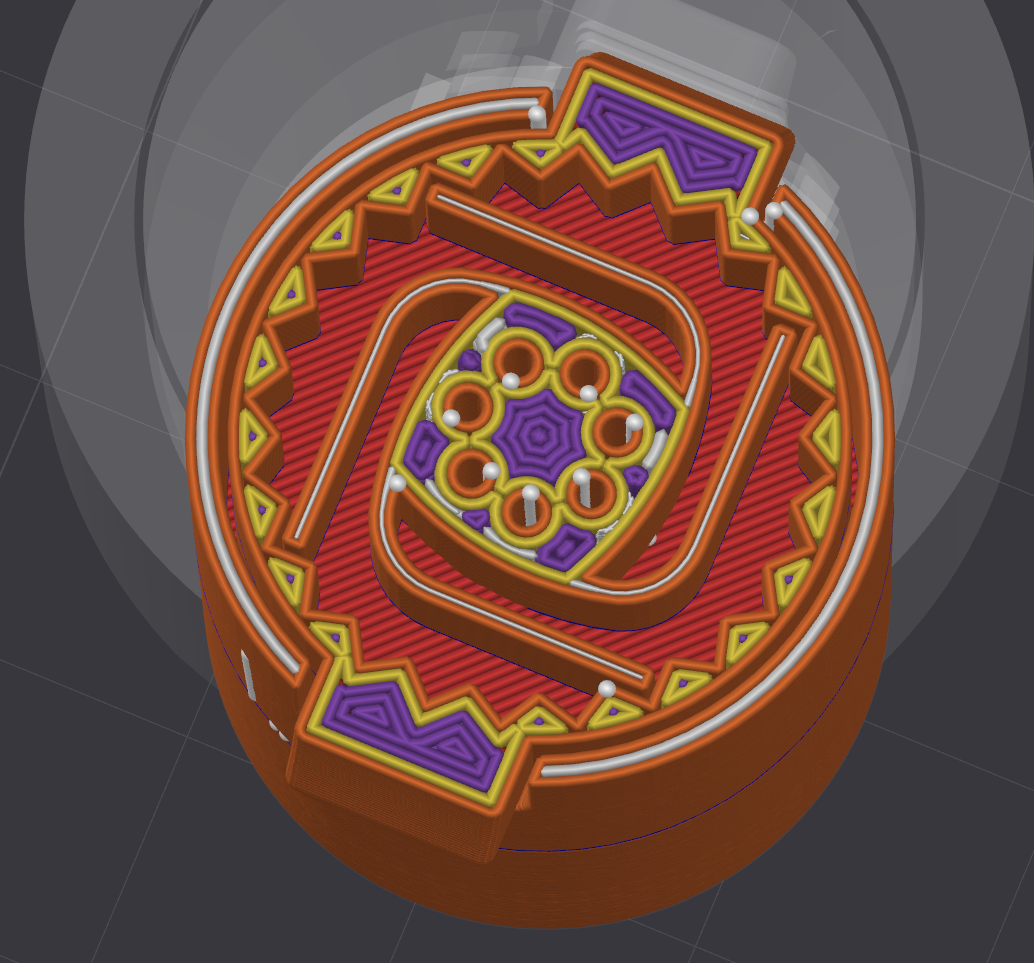
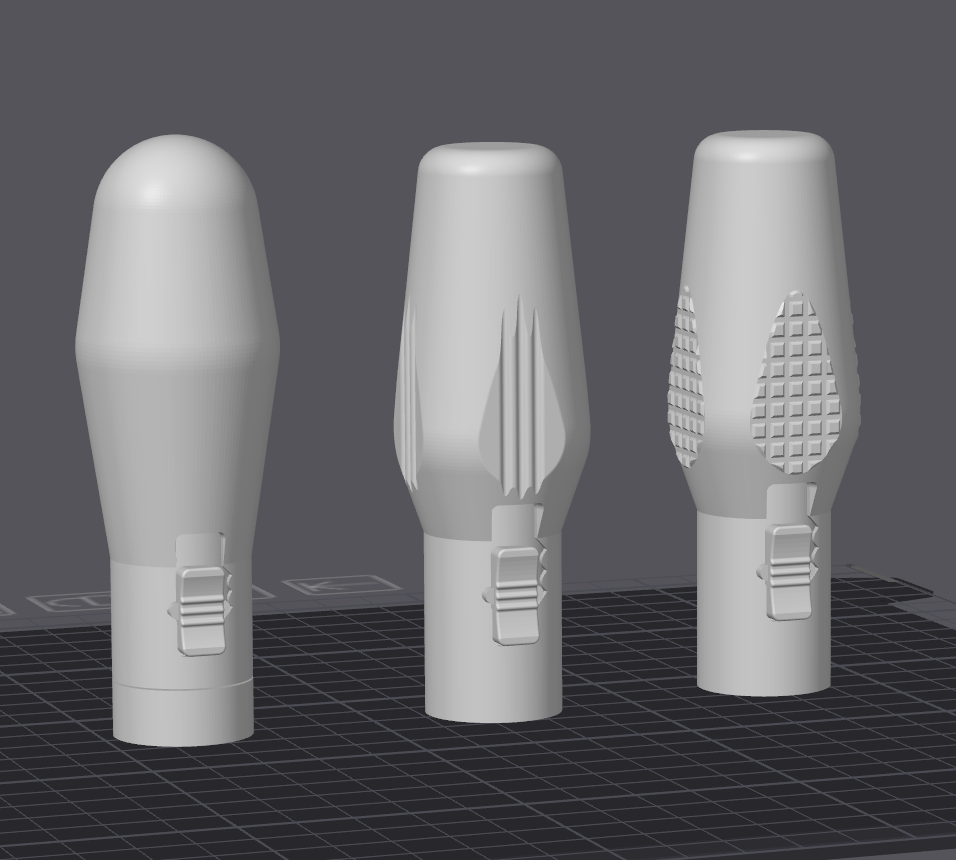
Research (or: looking at pictures and pretending I understand them)
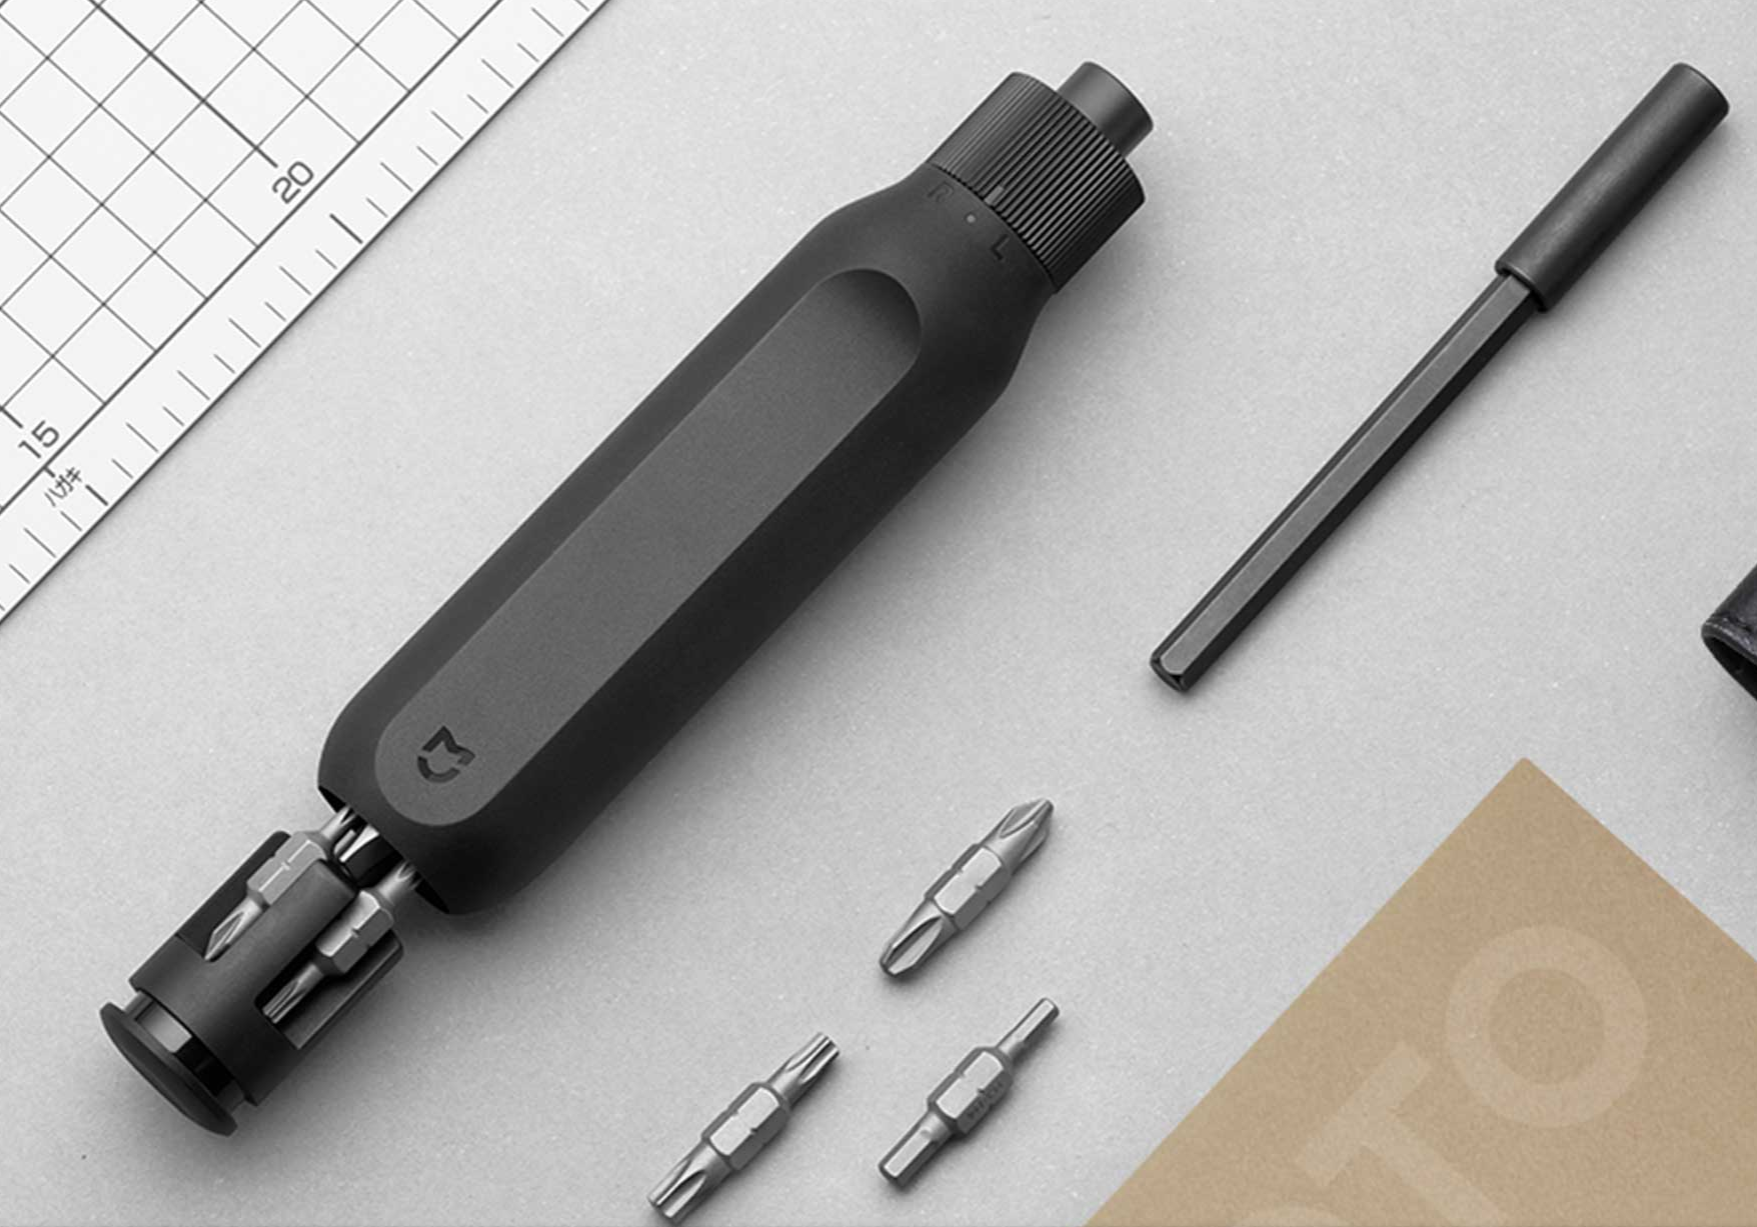
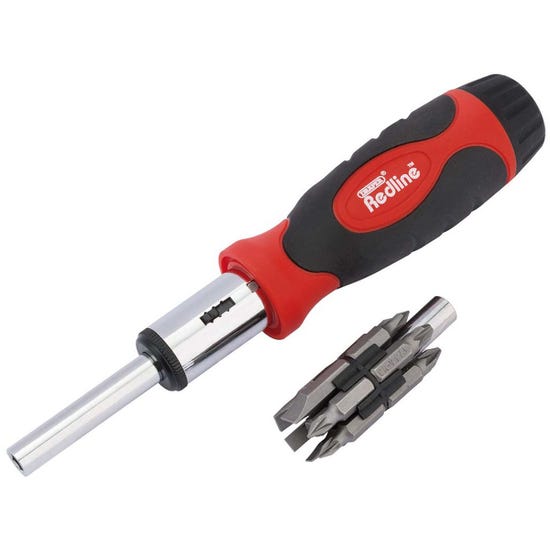
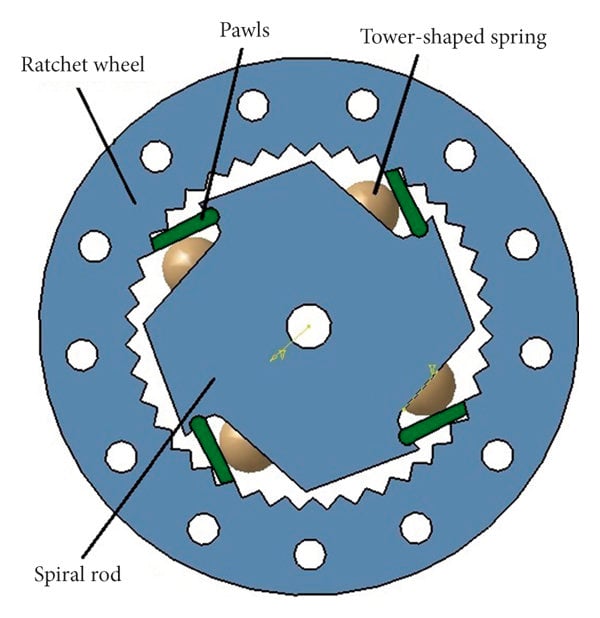
I started by studying existing designs:
All this research gave me a warm fuzzy feeling like this was going to be super easy. How wrong I was.
Milestone 1 - Solving the Wrong Problem First
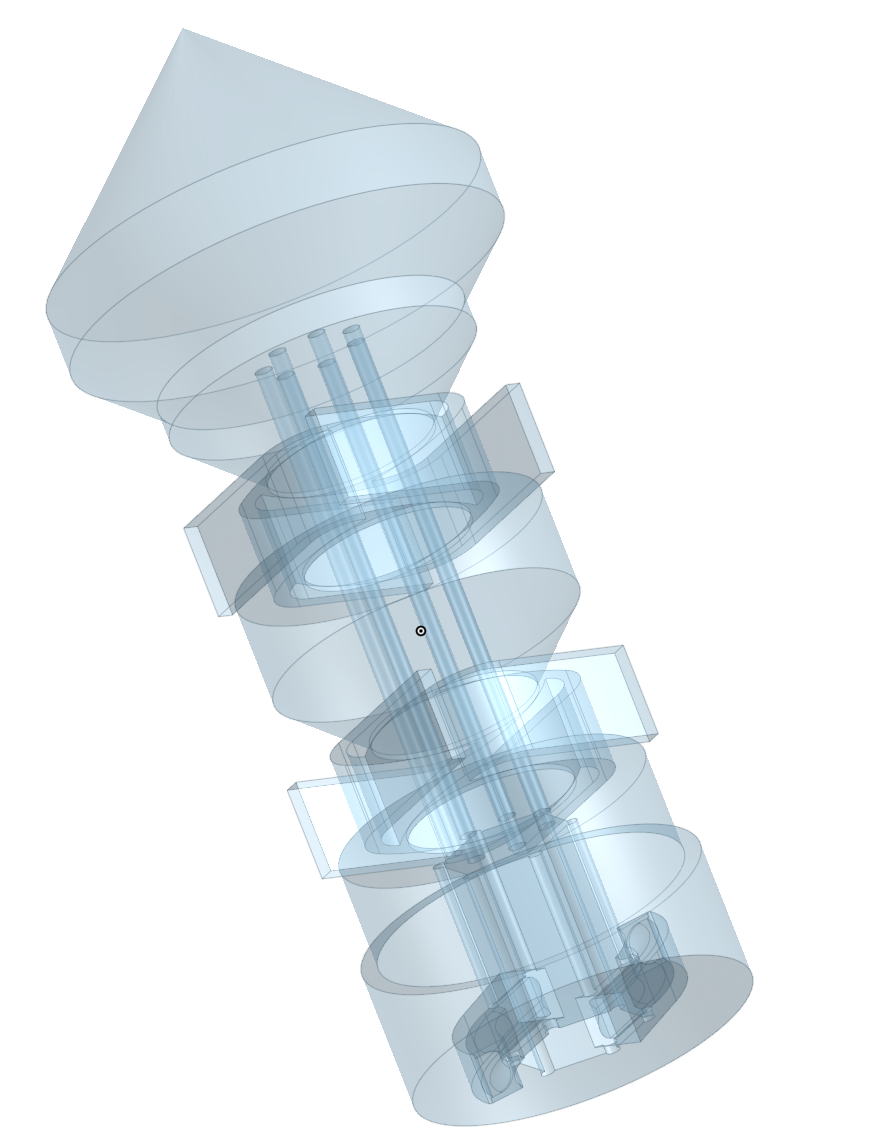
I started with the chuck because, obviously, that would be the hardest part. My goal was to create something that accepted a standard 6.35mm hex bit without relying on magnets, mostly because I didn’t have any magnets, though I do own multiple drills and a frankly excessive collection of bits. So naturally, instead of designing a screwdriver, I spent an embarrassing amount of time meticulously modelling a hex bit.
This detailed model became the reference to help me design the first real part of the screwdriver, a spiral retention mechanism designed to grip the bit, and while it worked, it was also completely overengineered for what I actually needed. I then spent several iterations making it smaller, breaking it, and making it slightly less small again, none of which mattered in the end since I didn’t end up using this design in the final version.
Takeaway: Think about what is the hardest part of a project and do that first.
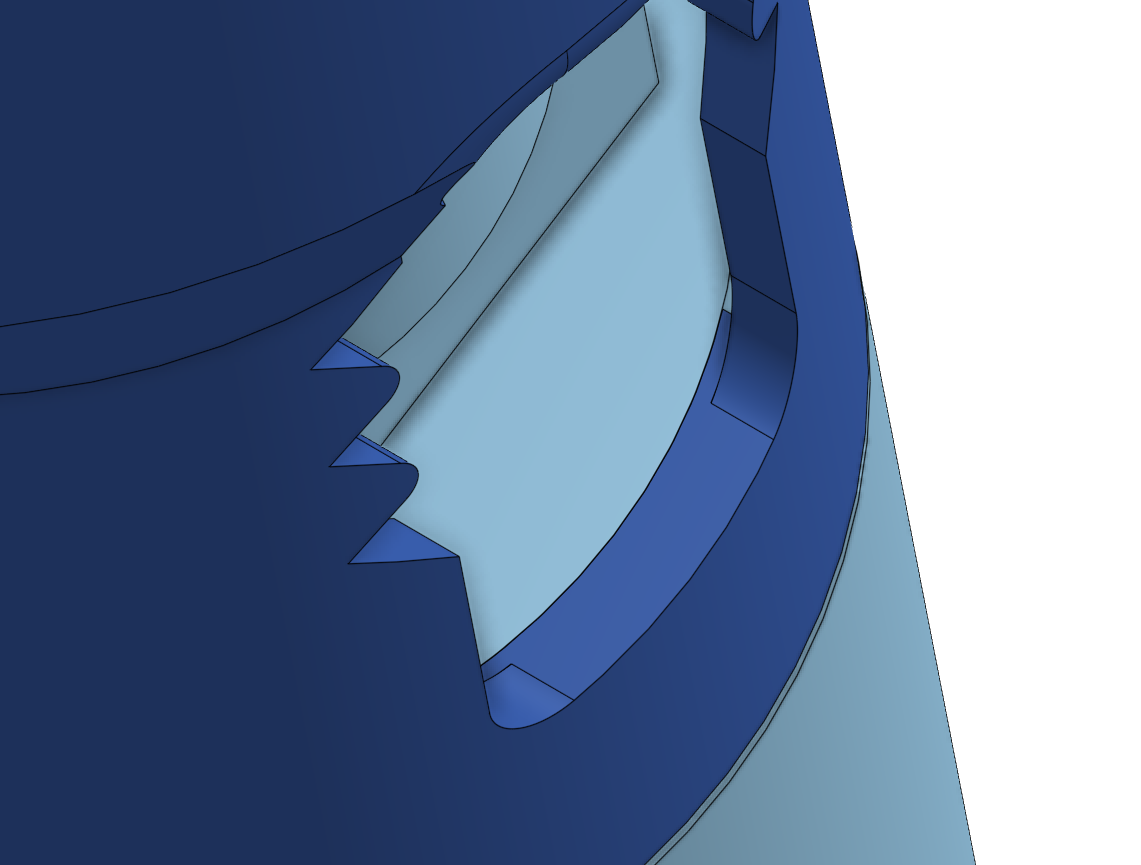
Milestone 2 - Learning What a Ratchet Isn’t
With the chuck “done”, I moved on to the mechanism, which I assumed would be the easy part. I had a nice mental model in my head: sliding selector, ratchet pawl, job done. Except it wasn’t. I built something that technically worked, as long as I handled it incredibly carefully with barely any pressure. It was fragile, inconsistent, and mostly just baffling.
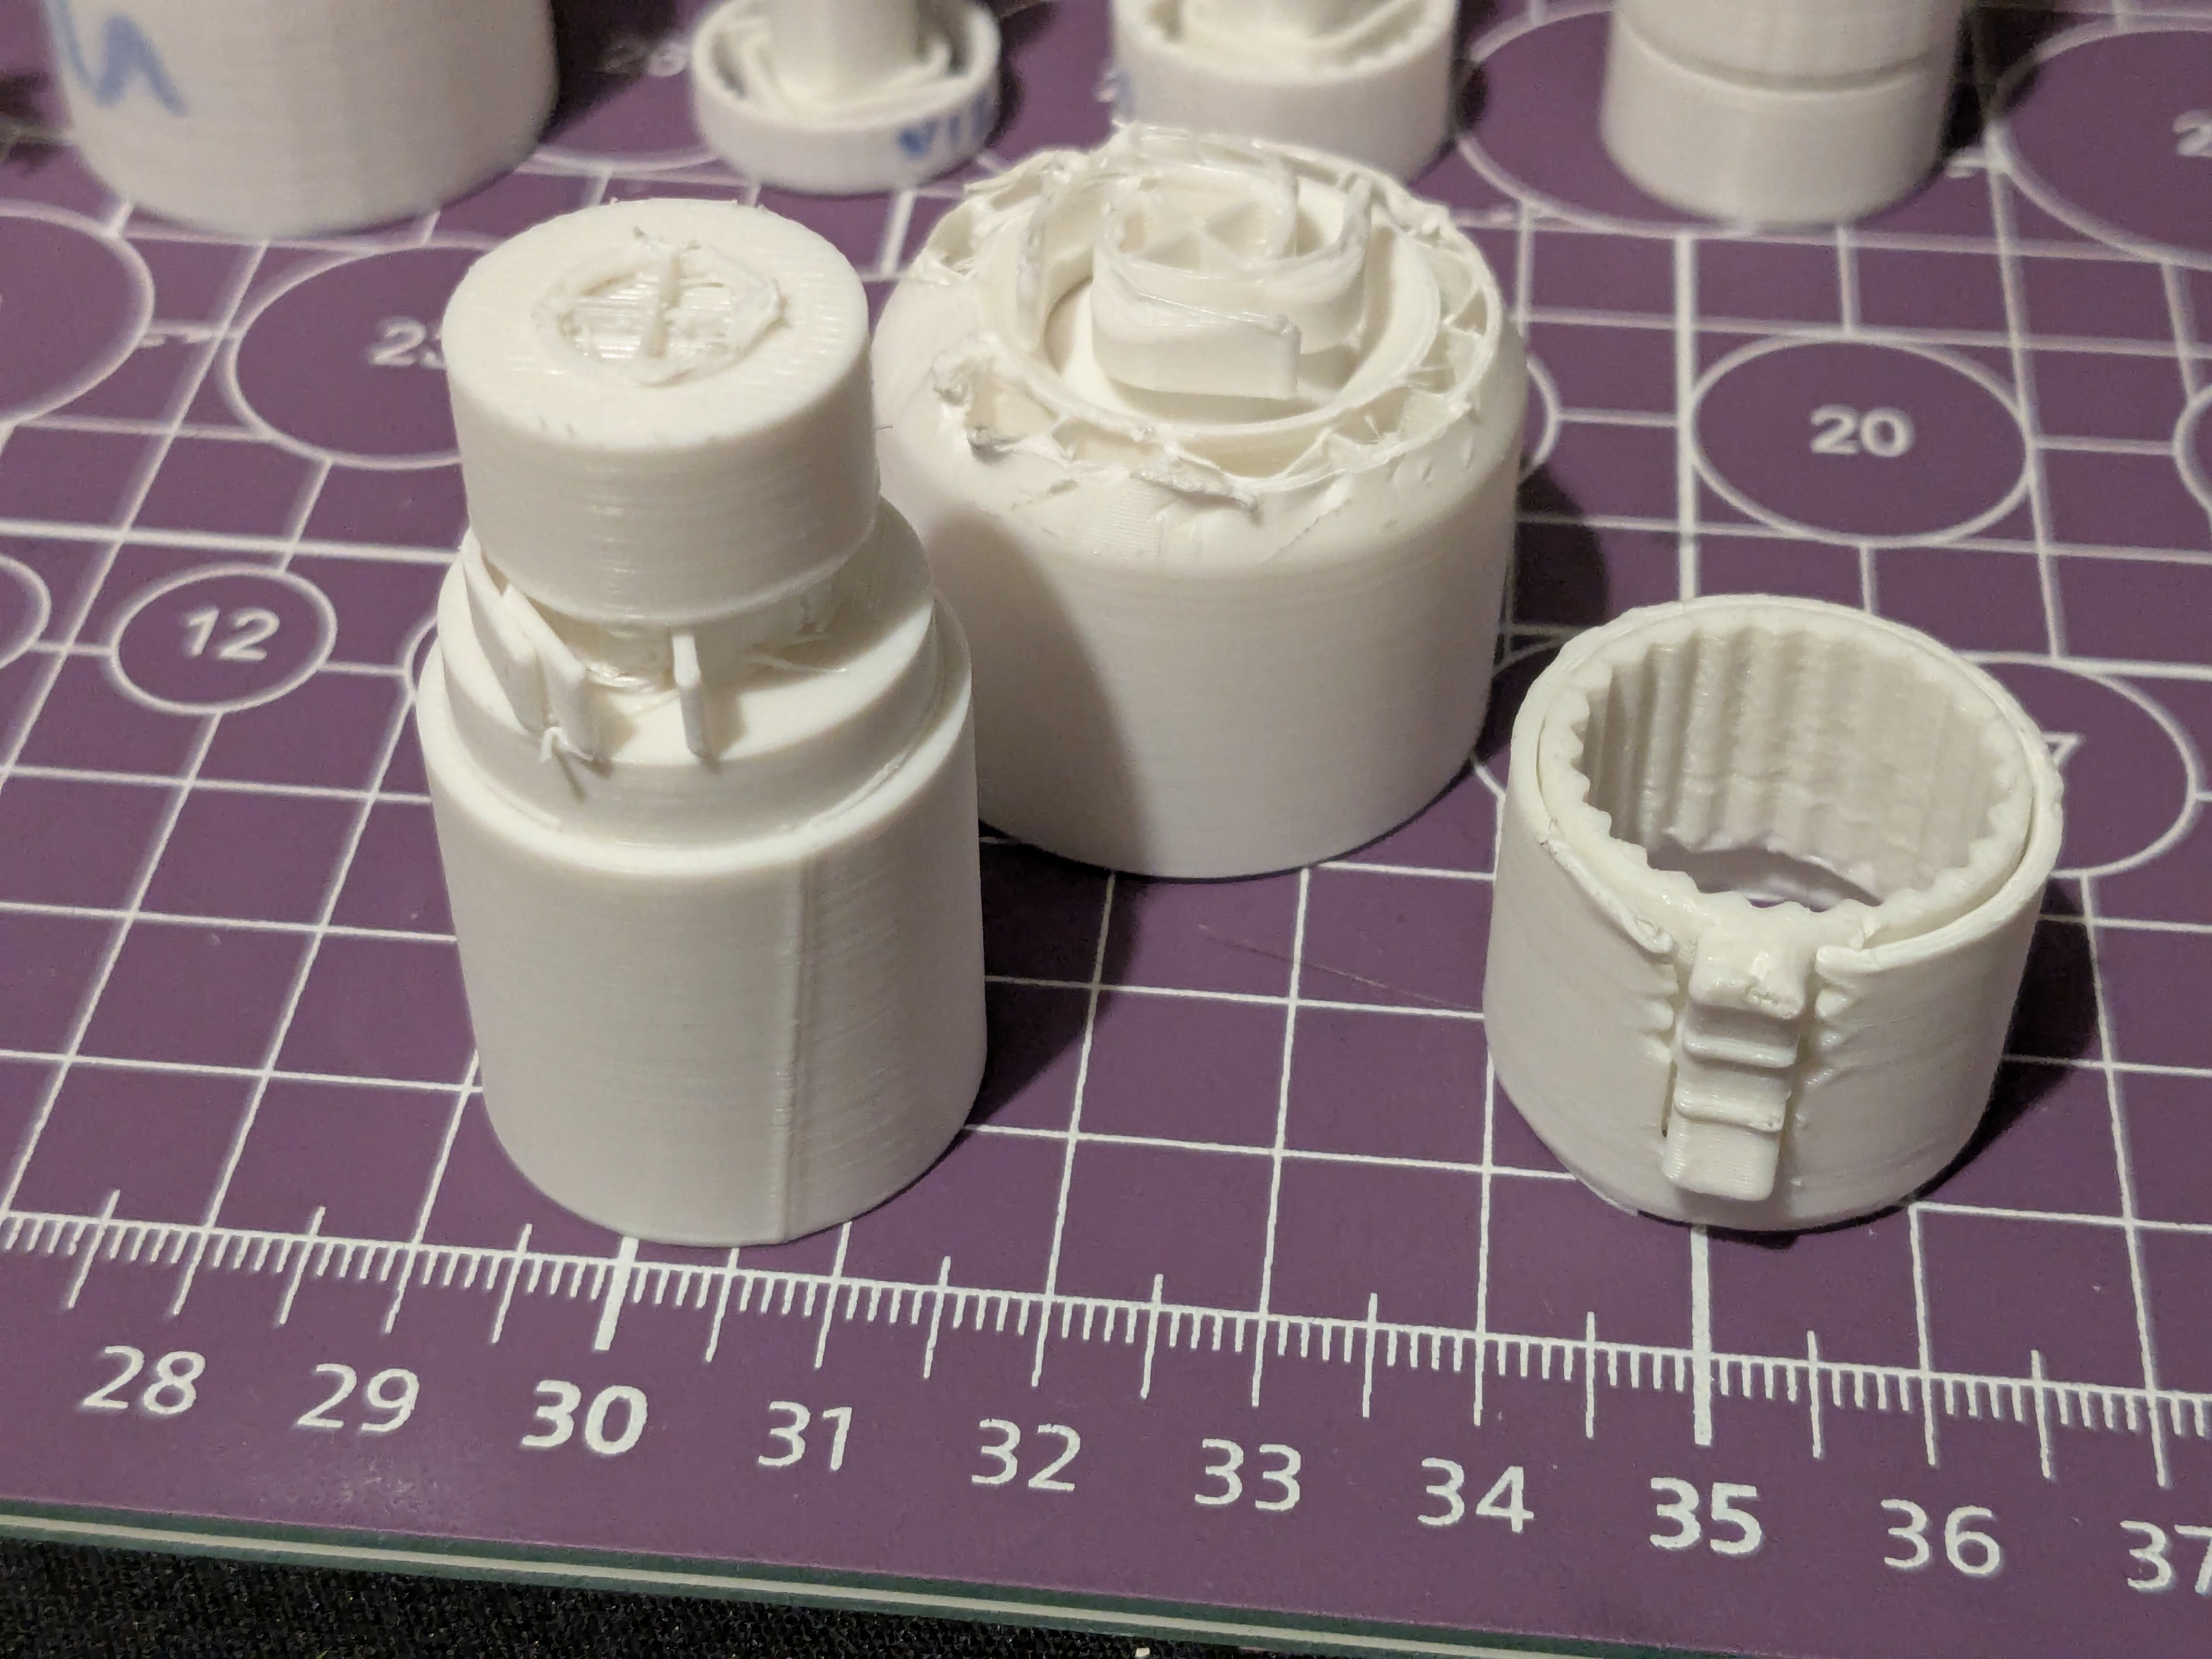
Then came the “teeth phase”:
- more teeth → didn’t print
- angled teeth → printed perfectly, worked in both directions, but not very strong.
- fewer teeth → still wrong
At one point it looked like a lightsaber, which I’m counting as a win.
I had been assuming more teeth automatically gave better strength, but the real failure mode was tooth flex and engagement length.
Takeaway: I could make something that looked like a ratchet. Not something that behaved like one.
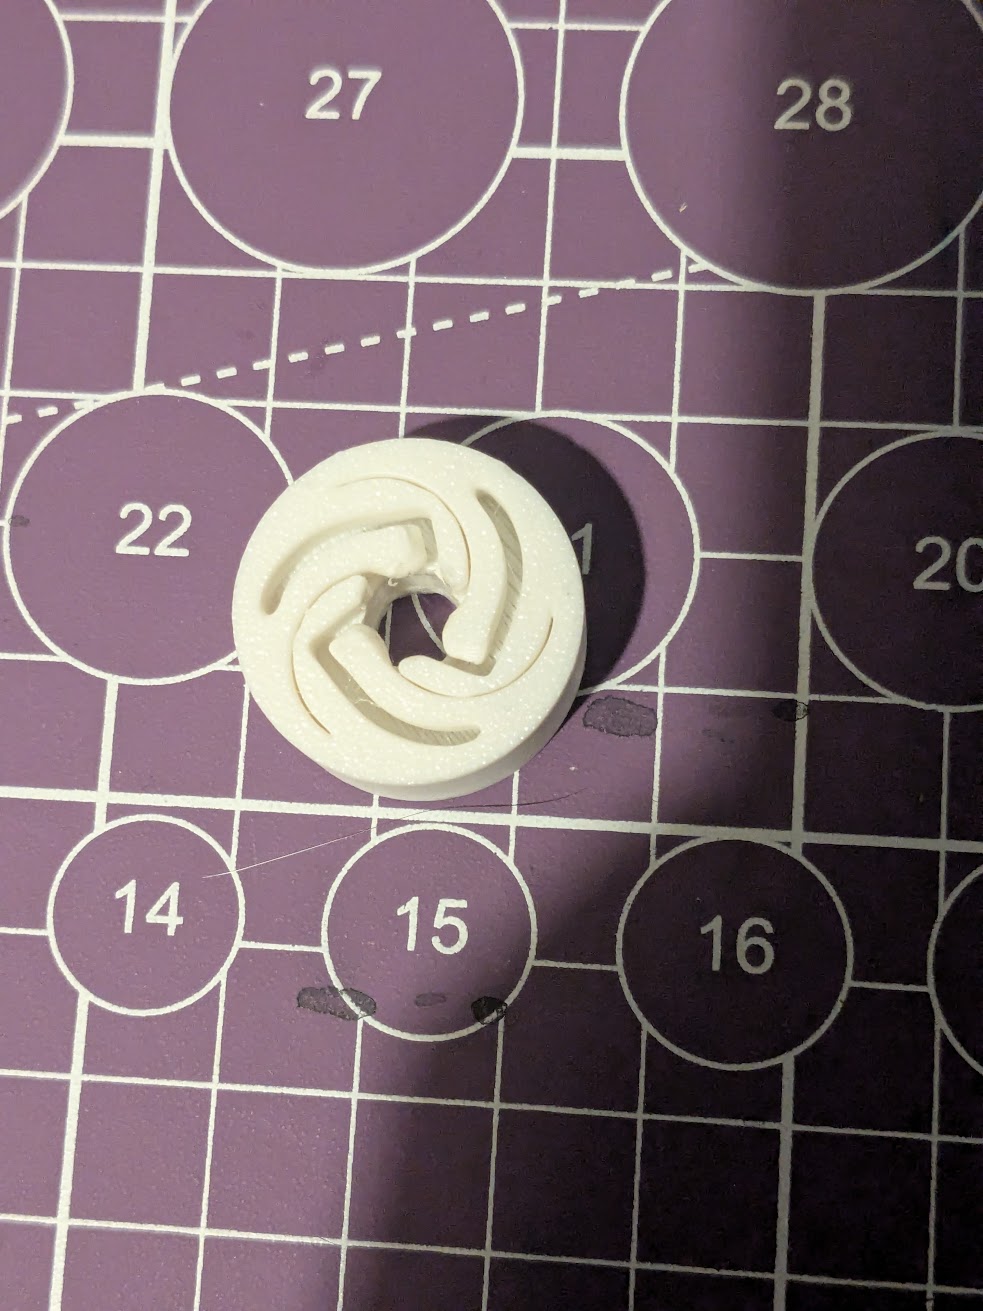
Milestone 3 - The “Turning” Point
At some point I realized I might just be making everything too small, so I scaled it up significantly and actually looked at my reference materials properly. That’s when it clicked: the mechanism was square. I’d been stubbornly trying to force everything into a circular design, so I finally stopped fighting the reference and switched approaches.
This version was massive, but it actually worked and I mean really worked. I could genuinely drive a screw with it, which was the turning point that made me realize the entire project wasn’t going to be a complete disaster.
Takeaway: Stop forcing the design into what you think it should be. Follow what actually works.
Milestone 4 - Making It Small Again (Properly This Time)
Armed with a working mechanism, I did the sensible thing: I deleted everything and started over from scratch, but this time I prioritized the mechanism first. I aggressively miniaturized, scaling down from ~35mm to ~15mm and printing only the bare minimum needed to validate the design. It worked, though only barely, so I scaled it up slightly and found the stability I was looking for.
Then came the scary part: making it fully print-in-place. With just a 0.3mm gap and no supports, I held my breath and printed it. And it worked. That was a significant moment, suddenly this thing might actually be printable in one go.
Takeaway: Scaling down changes everything. Print-in-place is just tolerances (and a bit of courage).
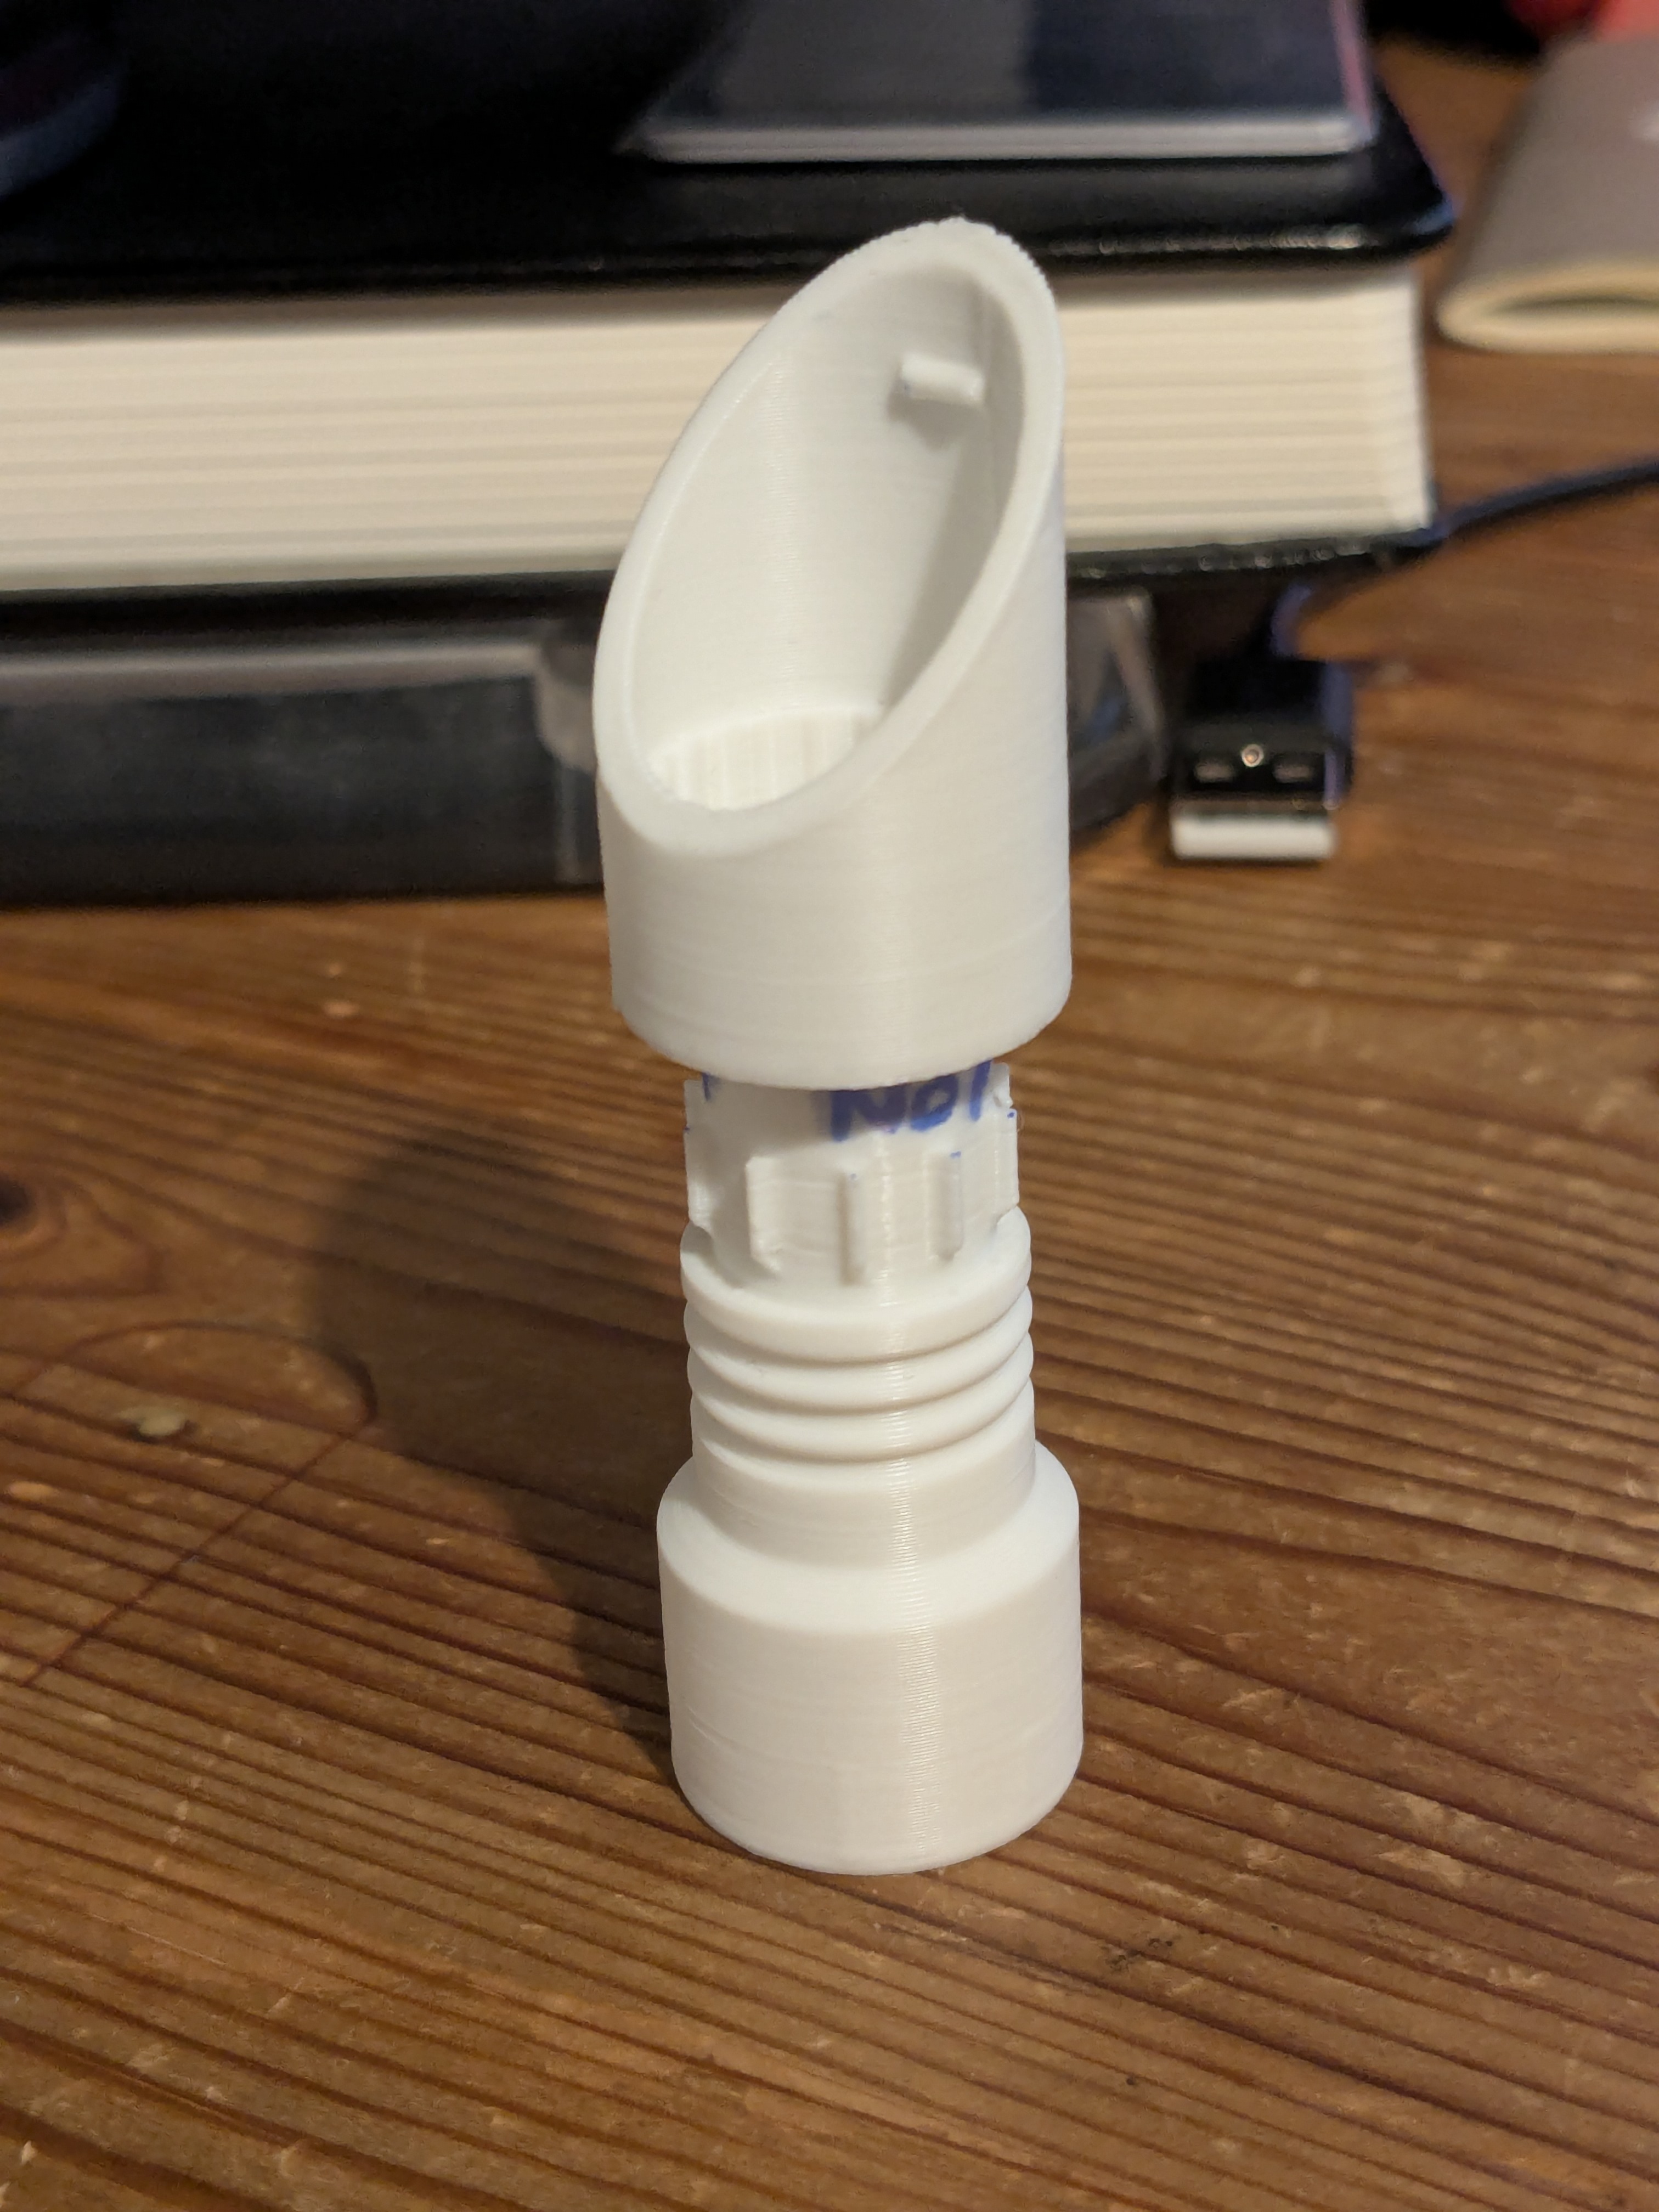
Milestone 5 - Turning It Into an Actual Screwdriver
Until now, I’d only had a mechanism, but now I needed to turn it into an actual tool. So I wrapped a body around it, and everything immediately fell apart. The teeth that worked perfectly before suddenly didn’t work, the selector got jammed, and friction became a real problem.
At one point I accidentally fused the handle to the shaft and created a completely solid screwdriver.
I then nearly injured myself trying to ratchet it anyway.

After extensive marking with Sharpies, breaking things, and staring at it until my eyes crossed, I finally identified the main issue: asymmetry. The selector needed to be actuated from both sides, otherwise friction would kill it completely once everything was enclosed. I also fixed clearances, stopped things from fusing together, and added internal pin holes for structural strength, which ended up working really well.

Eventually, it actually worked, and I mean properly worked.
Takeaway: Mechanisms behave very differently once you put them inside something.
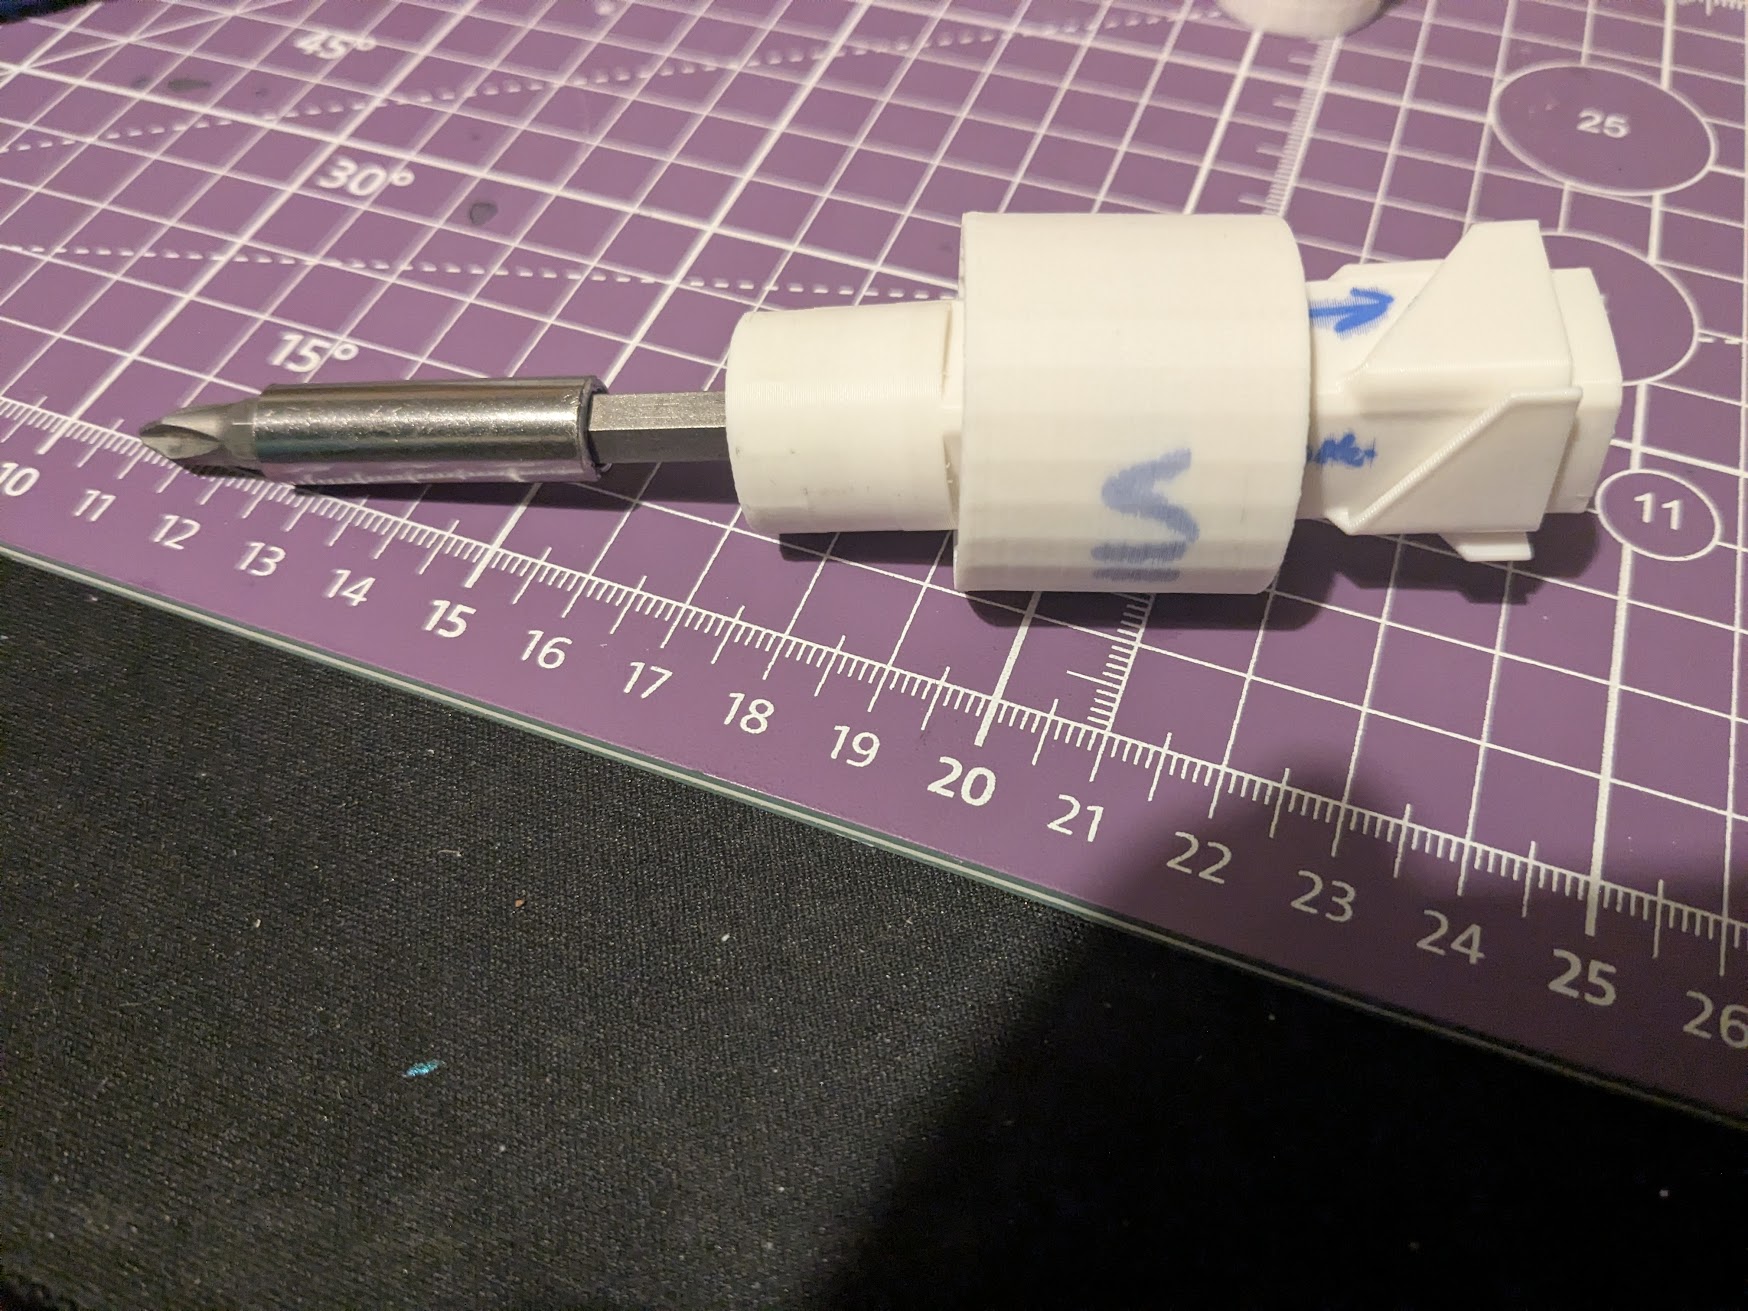
Milestone 6 - From “Works” to “Actually Good”
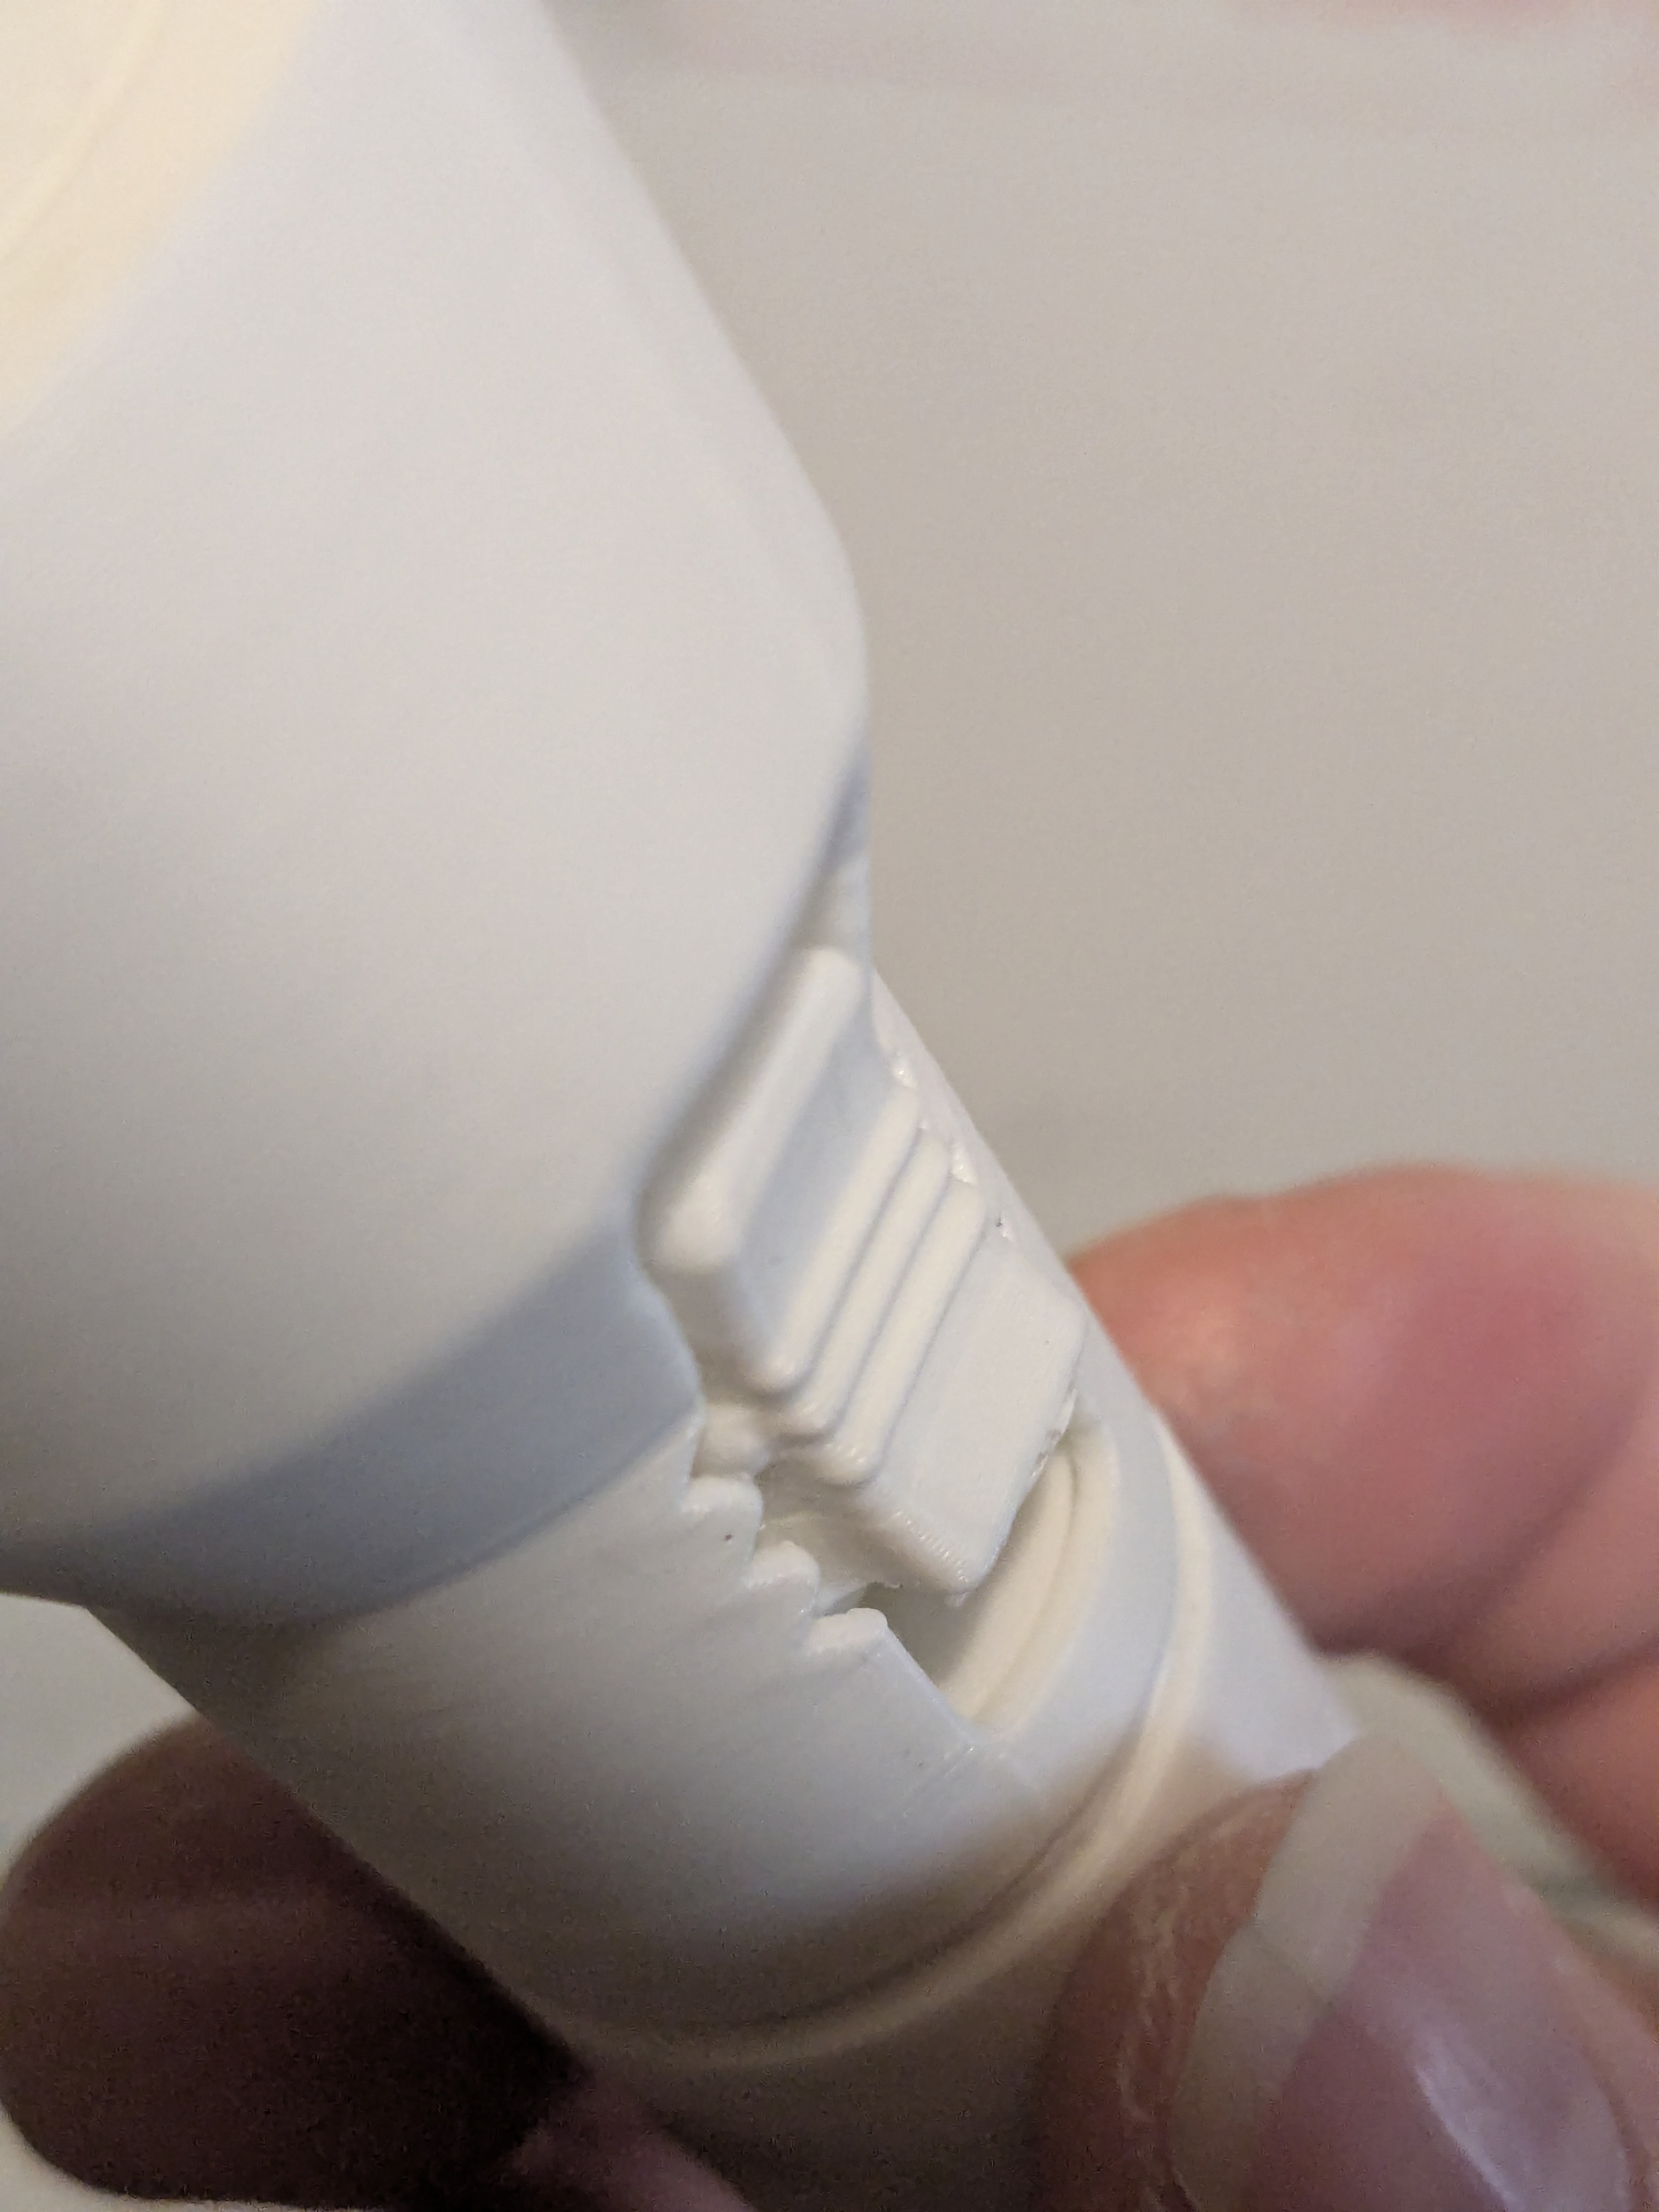
Now that I had something functional, it was time to polish it and make it actually good. I started refining the design by fixing deformation that resulted from the print geometry, smoothing out the ratchet feel which had been good in one direction but frustratingly crunchy in the other, adjusting tooth height repeatedly, simplifying the chuck back to something different but better than iteration 1 (it wasn’t a waste of time, I just learnt more about how the material behaves since the first iteration), and loosening the selector so it didn’t require a hammer to operate.
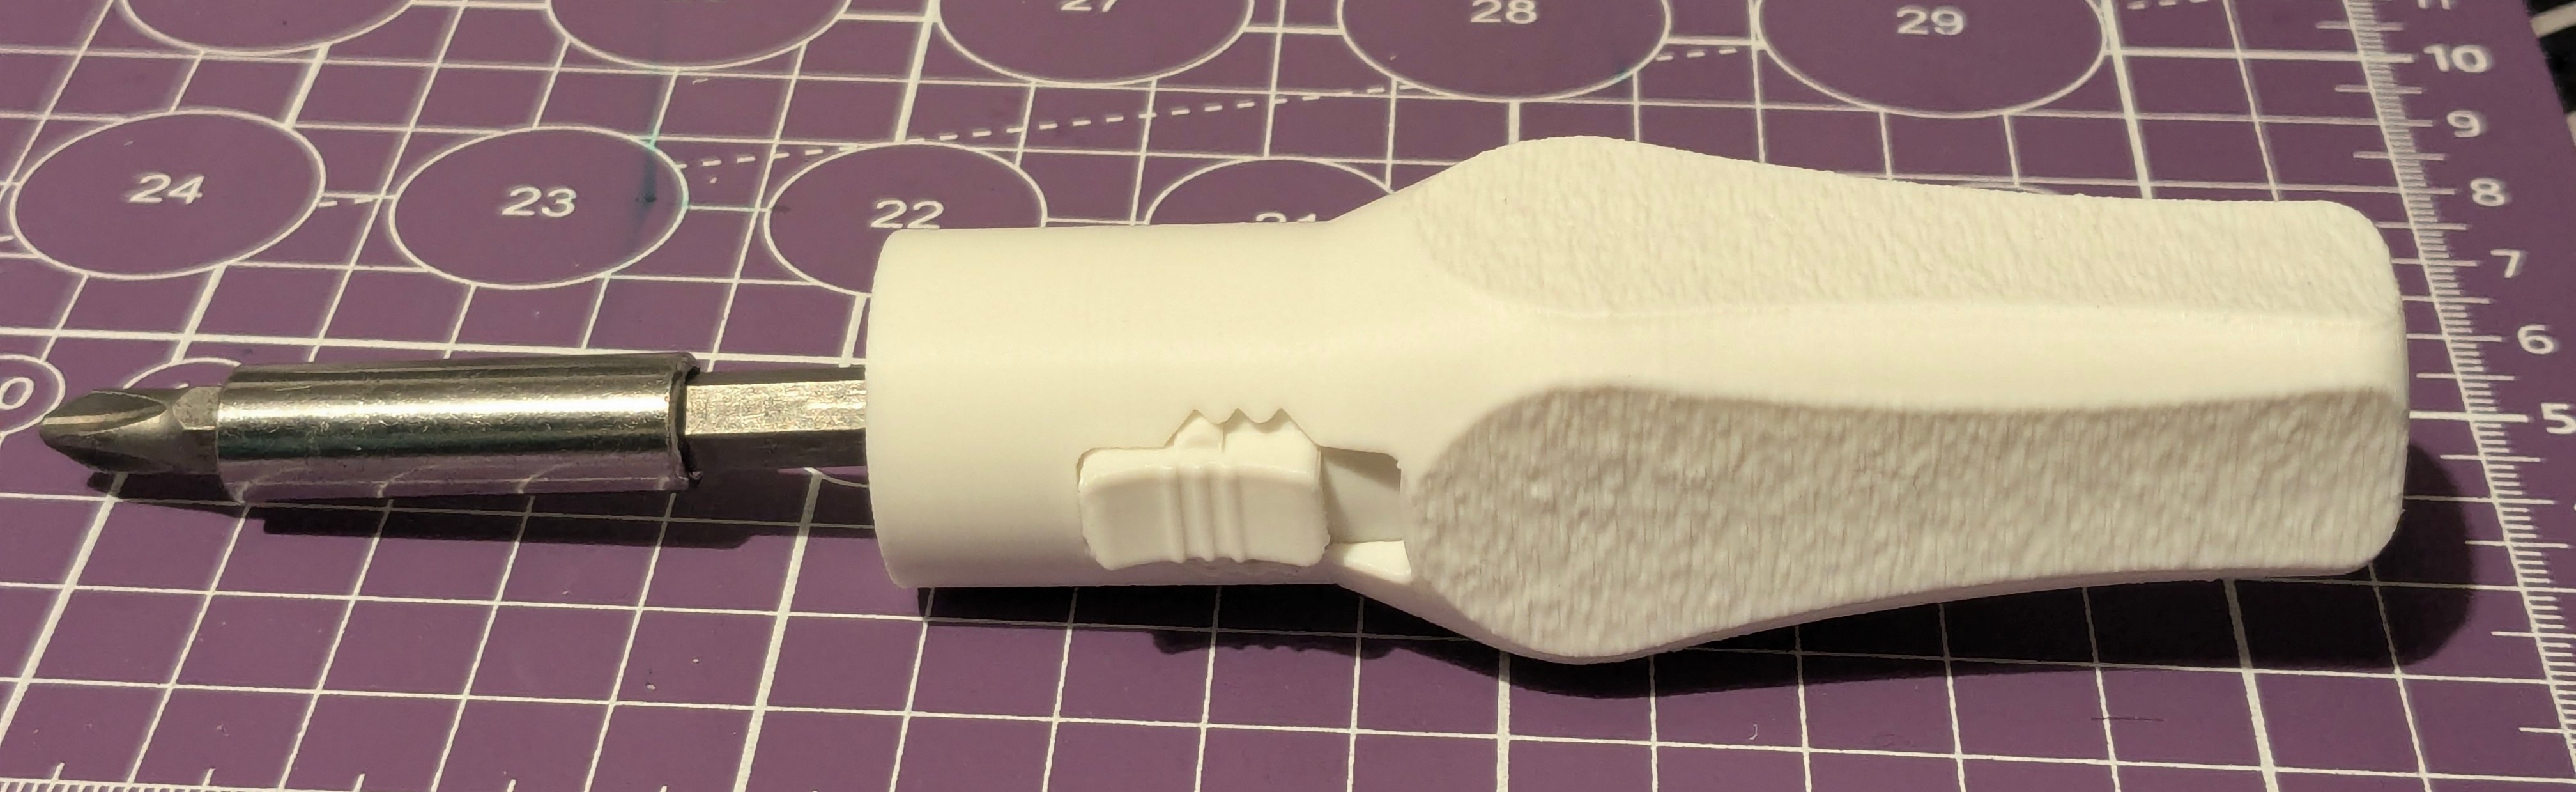
Then came the final pass, where I tightened tolerances, improved the handle shape, reduced internal play, removed the grip pattern and used fuzzy skin in the slicer instead (highly recommend this feature), and removed all floating geometry entirely.
And that was it.
Takeaway: A working mechanism is not the same as a good tool. The last 10% is all feel.
What I learned (numbers and rules)
The key lessons from this project:
- prioritize mechanism first and always
- scaling up is massively underrated
- print-in-place is about tolerances, not magic
- you will throw away a lot of plastic
- Sharpies are essential engineering tools
- overengineering is fun, but iteration wins
My printer settings and model information:
- Download final version here: https://www.printables.com/model/1656899-print-in-place-bi-directional-ratchet-screwdriver
- Printer/material: Creality K2 Combo, PLA, 0.4mm nozzle, 0.2mm layer height (better overhang control for floating parts).
- Clearances: 0.3mm for freely moving parts; 0.15mm for controlled friction surfaces.
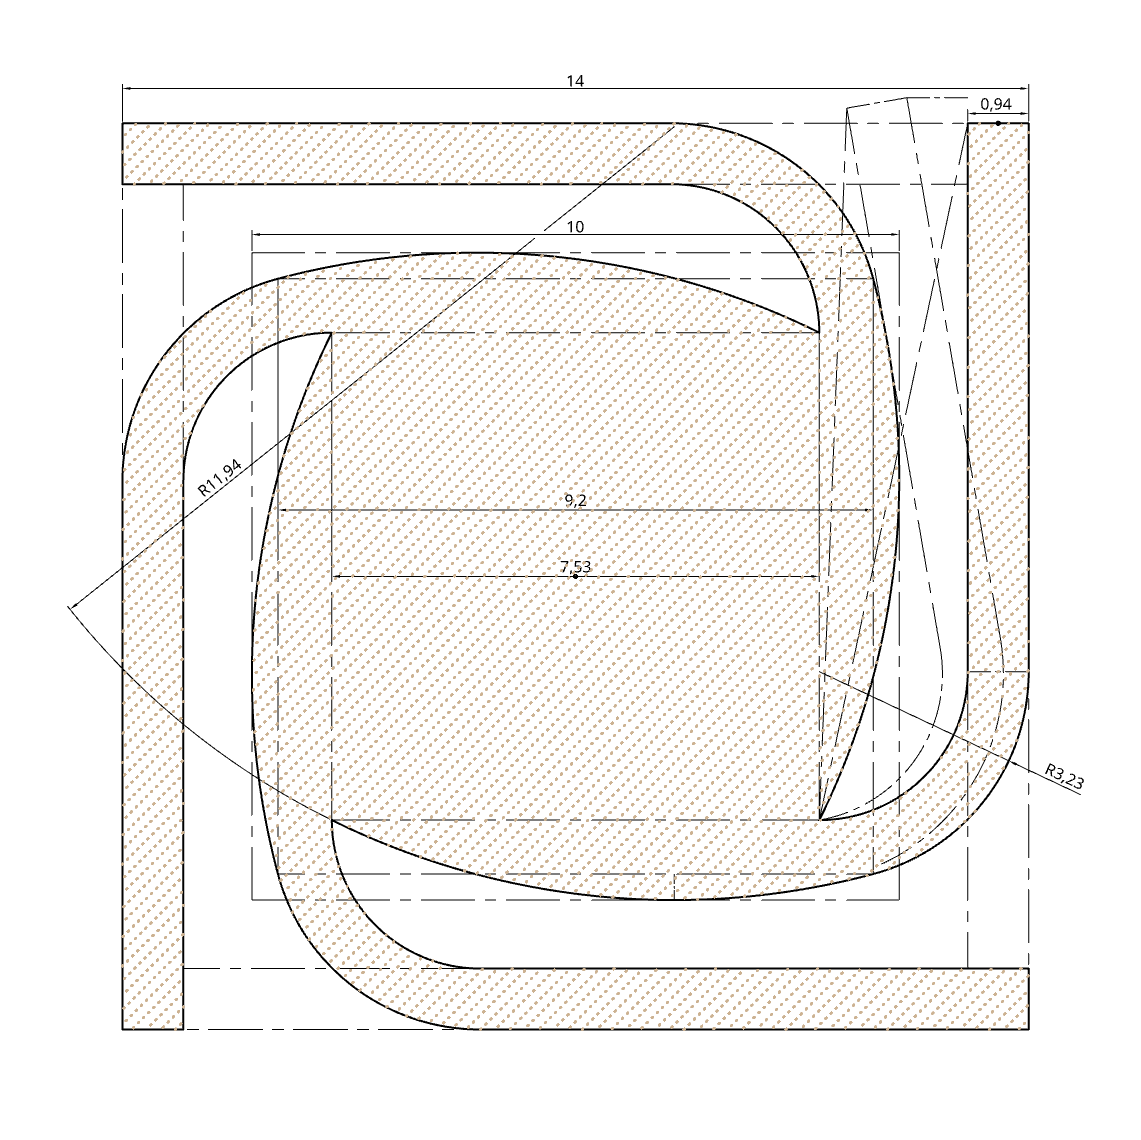
- Mechanism dims: final pawl thickness 6mm, initial racthet ring was 32mm diameter in Milestone 3 but eventually scaled to 22mm by Milestone 4.
- Design rule: tooth count is less important than tooth length and stiffness for torque transfer in 3D print-in-place ratchets.
Quick advice - Pick a working mechanism and then miniaturize it (not vice versa).
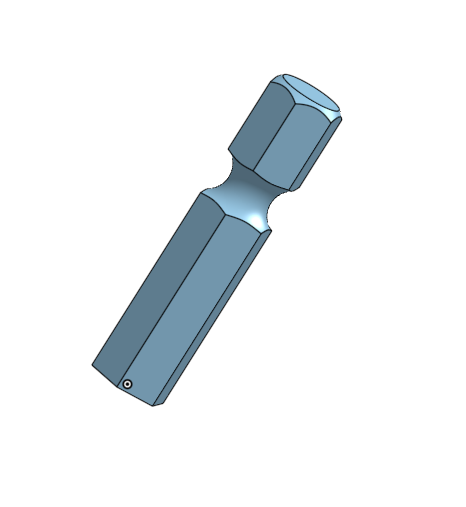
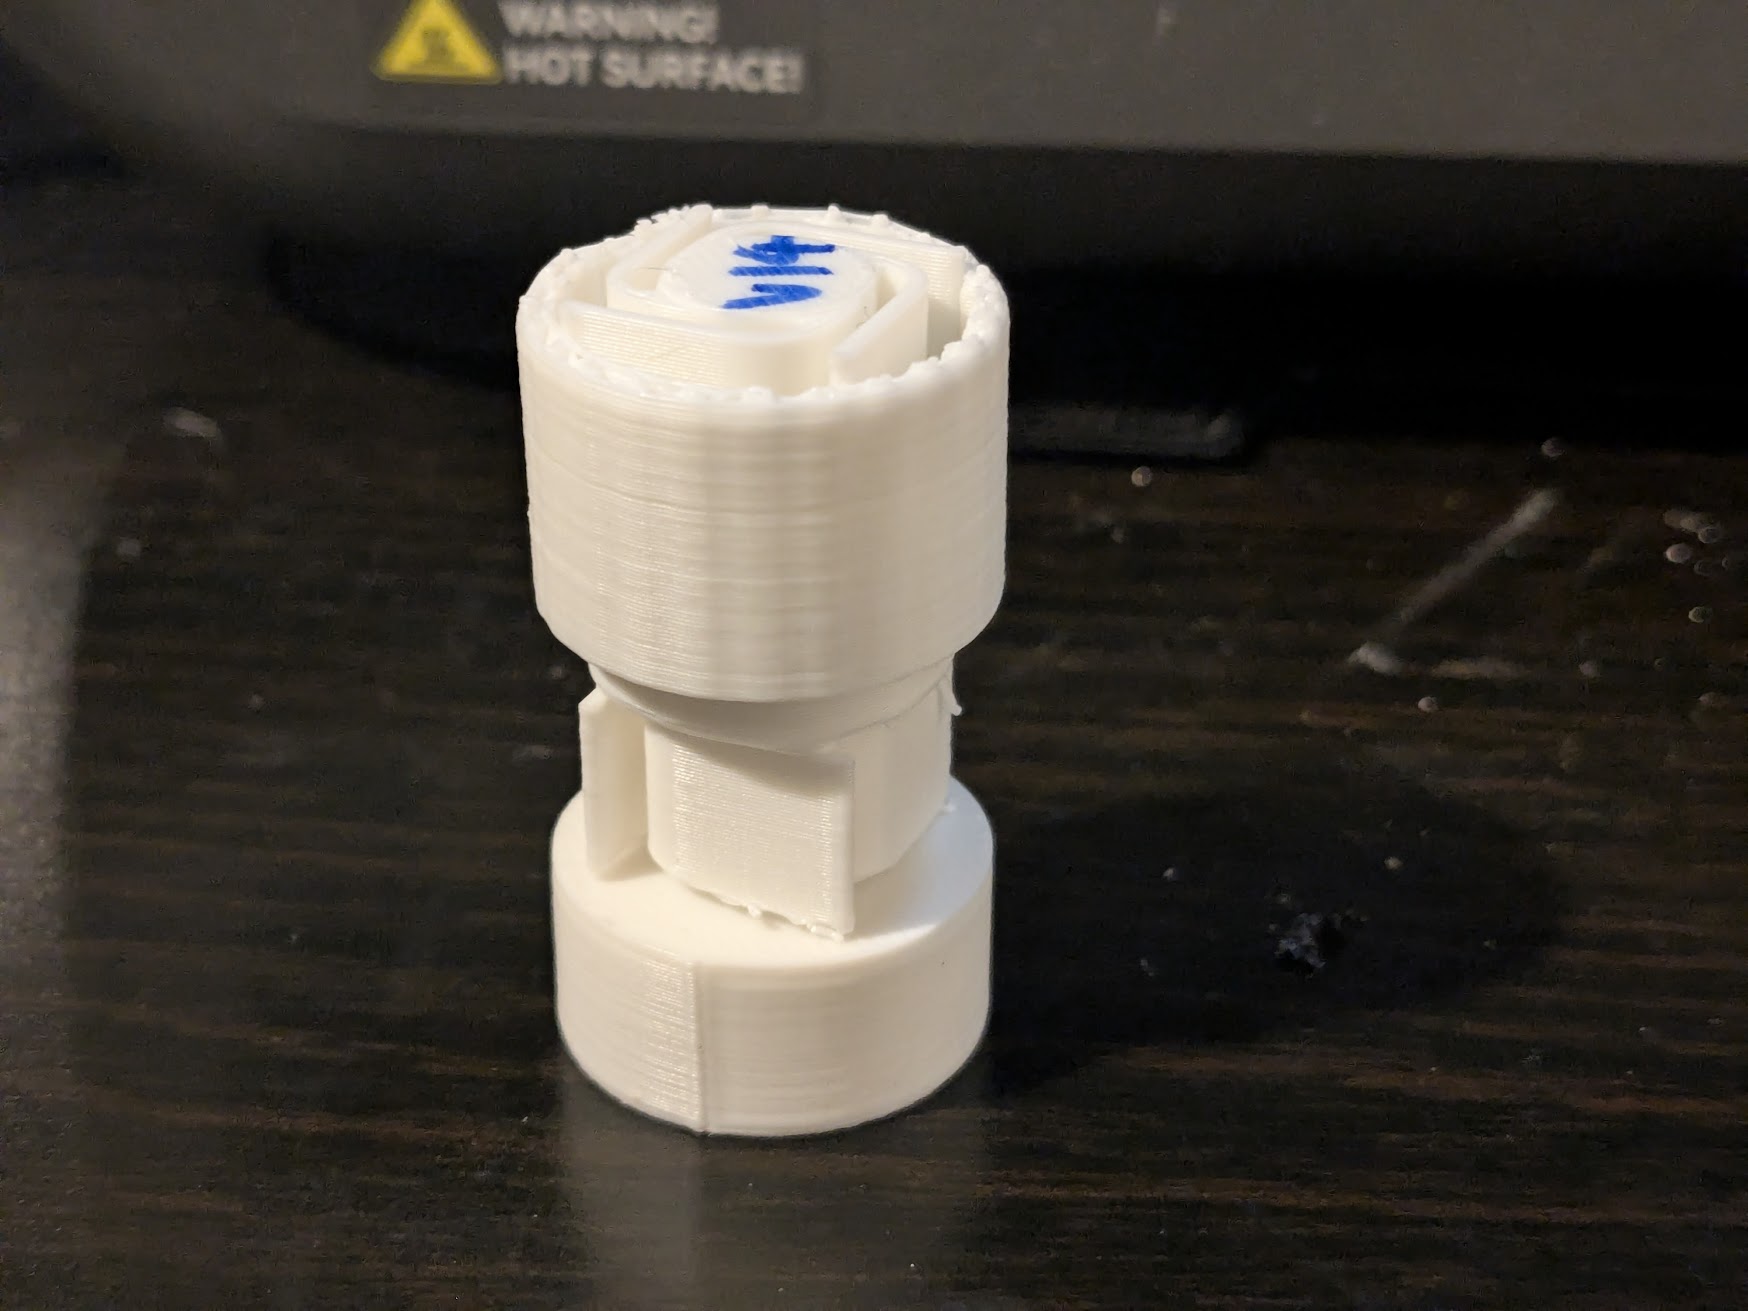
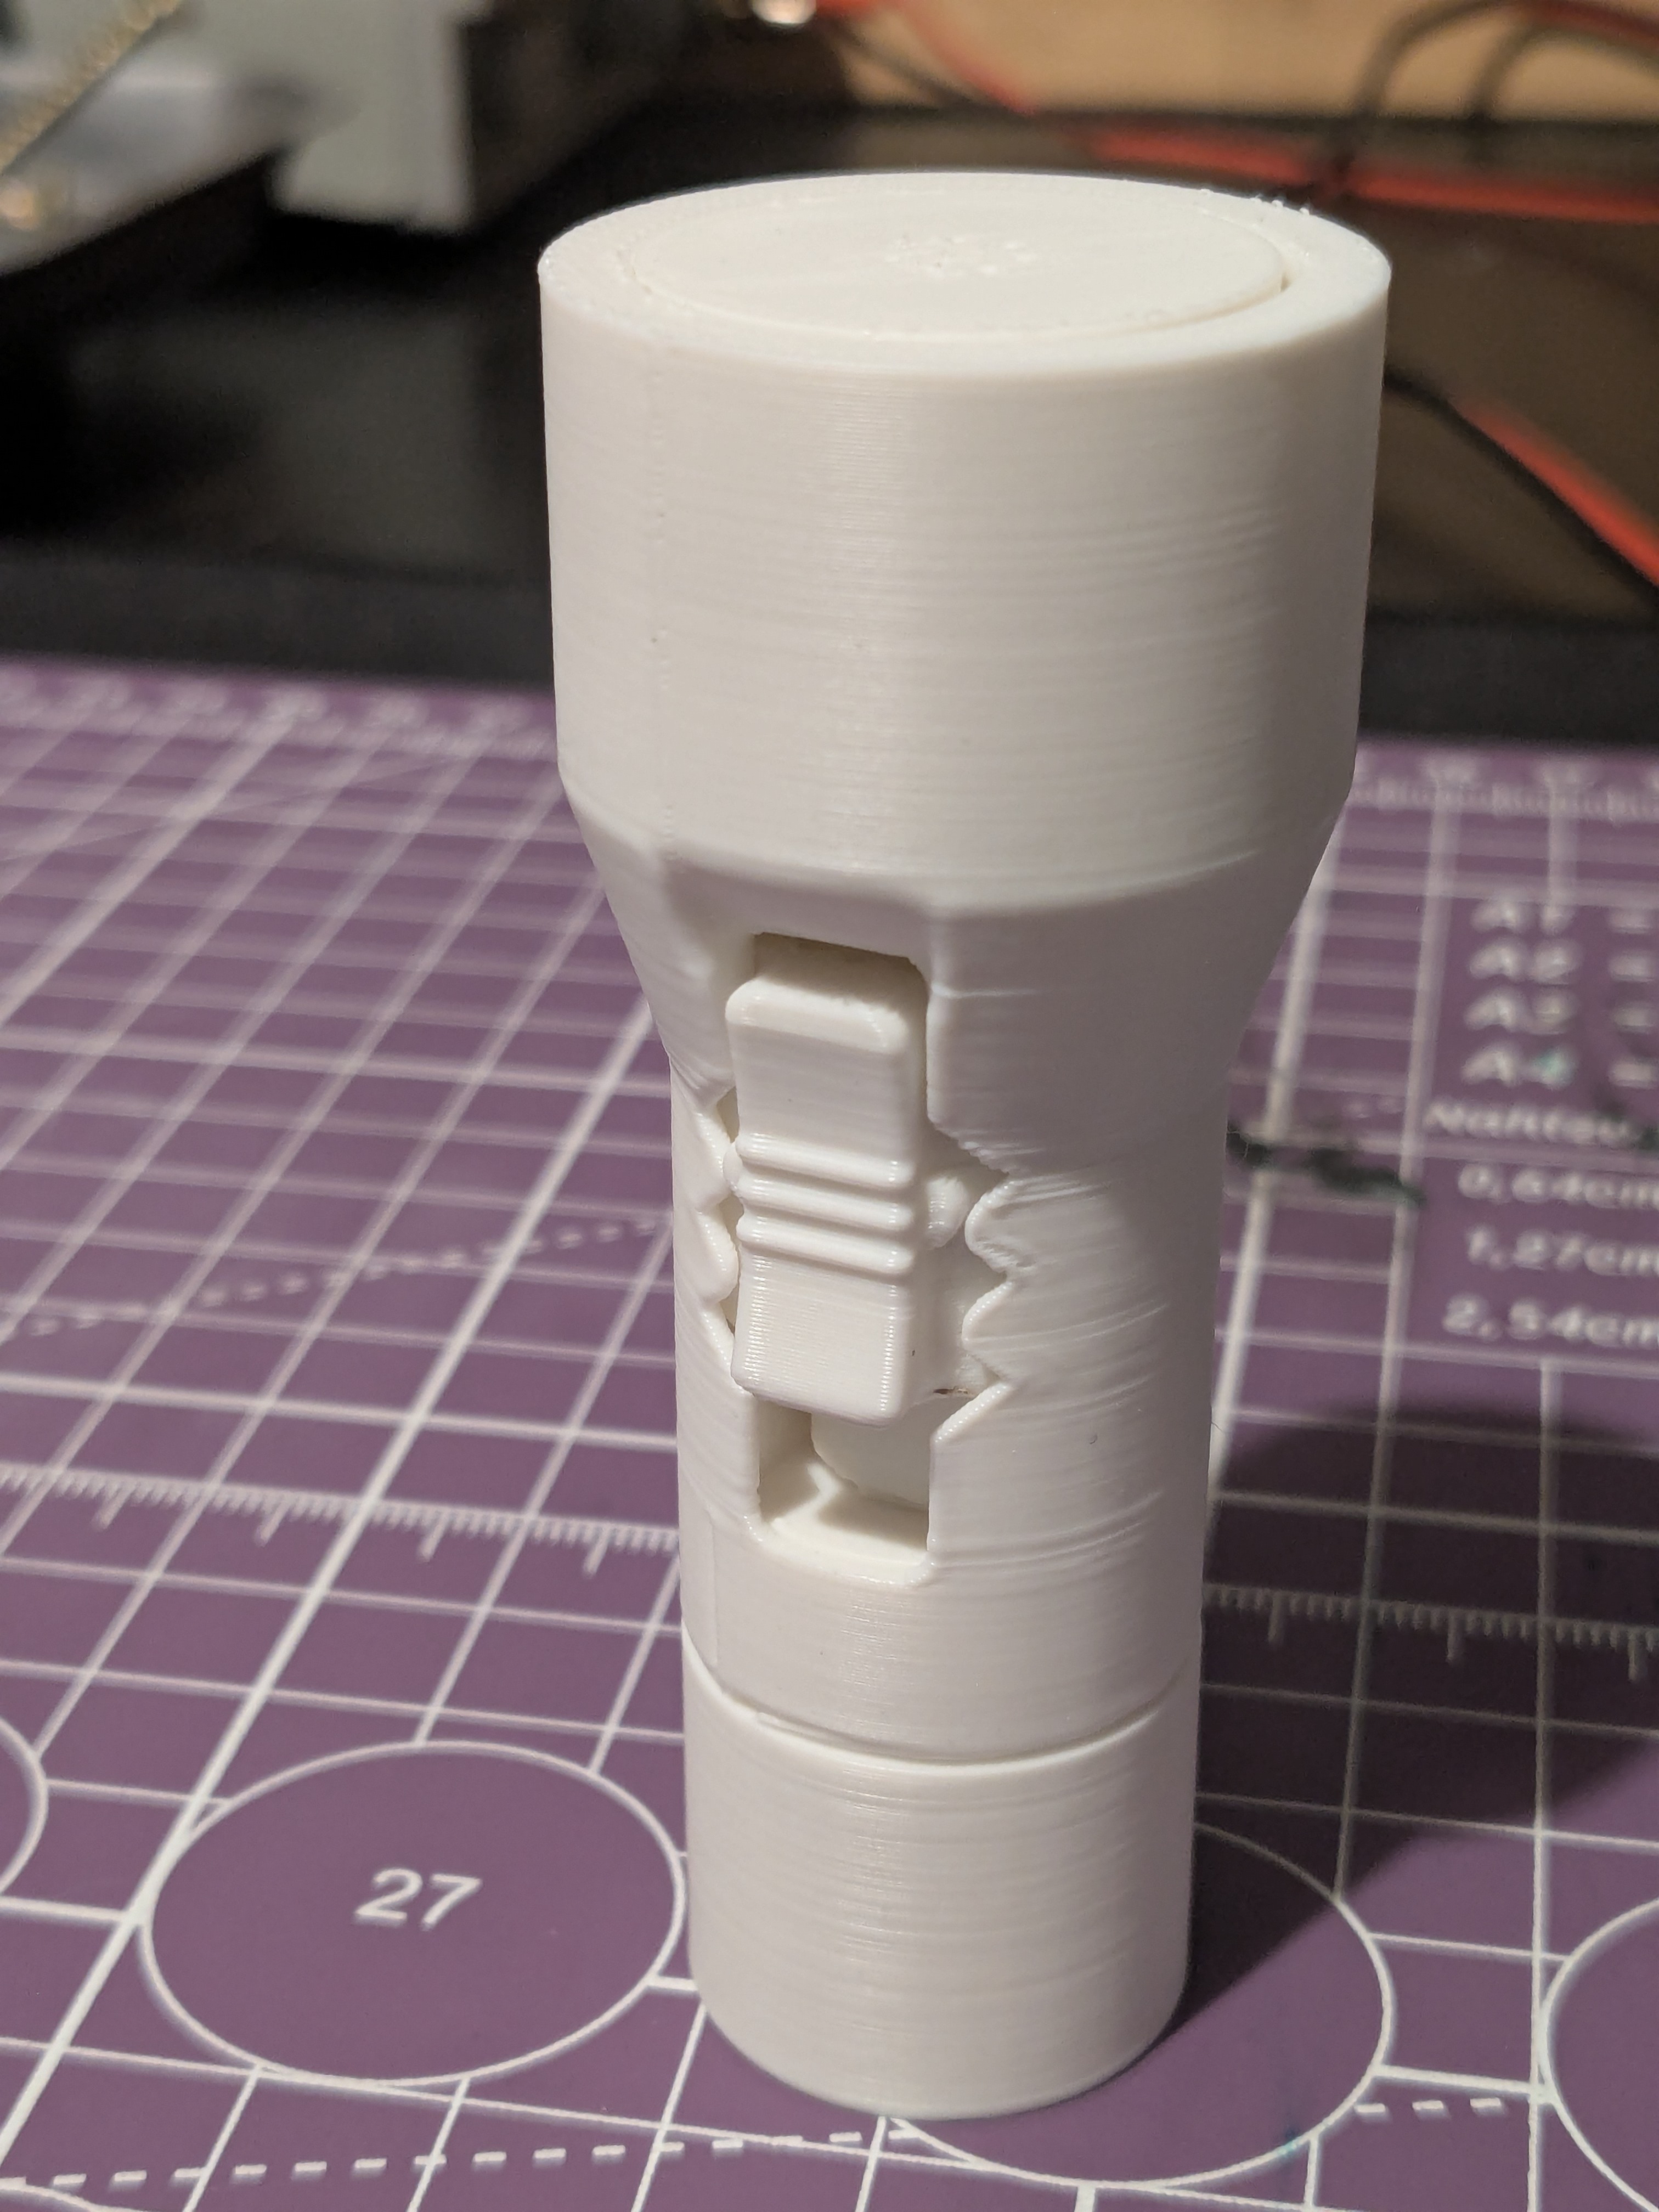
Final Result
Here’s the finished screwdriver in action, fully functional, it ratchets smoothly, reverses reliably, locks securely, and most importantly, it didn’t cost £15.
What I’d do next:
- Print the same design in PETG to compare wear and torque resilience.
- Perhaps add a place in the handle to store 6mm bits like in the examples I researched